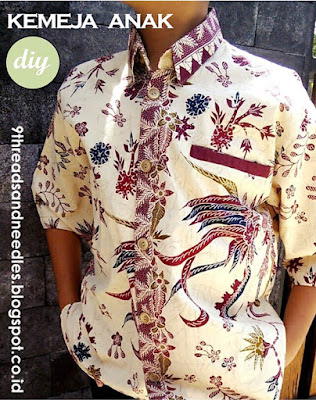
Sewing Batik's Shirt for Boy
Want to try to make batik shirt as well? Check this one out ...
What you need:
- Batik's fabric, I choose soft cotton material for comfortable use for children.
- Interfacing
- Pattern, and other sewing supplies
- Welt rectangle (interfaced rectangle) that is about four times the height of the welt and a couple centimeters wider.
- Pocket facing - ( same color as the welt rectangle) a rectangle approximately the size of welt piece that will be top-stitched to the pocket lining to act as a backdrop for the welt pocket
- Pocket lining - made out of thin cotton or some other pocketing material. The width is the same width as the welt rectangle and about 30 centimeters long.
PATTERN
Make shirt pattern. Prepare a shirt pattern for boy, make sleeve pattern and collar, here because i was hunted by the time I choose to use ‘One Piece Collar’ as the collar ( it is the fastest way to make collar). A short way to make a pattern of child clothes you can see pola baju anak in other parts of this blog.
Or you can click DOWNLOAD POLA for shirts in the form of pdf files that you can print yourself. Do not worry .. download this pattern is Free. And I am so sorry, this is not the best pdf file I made, so sorry if the image will a bit blur, but as my friend said it is quite helpful.. ^_^.
And from the print paper you will get the pattern like the tile scheme for the following A4 size paper.
Assemble the paper with glue.
Note : this pattern is for elementary student's aged ( my son is 11 this year) , you can adjust following any size you want.
Okay.. Lets move..
Instruction
Cut The Fabric
Importan to know! before cutting the batik, observe the motive first .. The direction of each picture, facing up or down. If it's a flower, see if the flower is sown or facing in one direction or not. If it is animal design, observe the image which direction are the animal's face.
1. Cut the bodice
Front : 2 pieces of right-left, do not forget to fold the center top/front about 7 cm wide to make the front placket).
Back : fold the center back before cutting
Collar ( 2 pcs) ,
Pocket set including its liner and facing
SEWING
( image 1a – 1b ) Press interfacing with hot iron , then make the collar.( image 2) Sew together back shoulder and front shoulder. And finish with serger.
( image 3) Press interfacing to the front placket, fold following lines mark in the pattern then make a top stitch on it
( image 4) Place collar on the neckline, Pin. Then sew it. don't forget to trim the seams before making closing stitch
( image 5) Draw marking on the chest to place the pocket. It's wide about 12-14 centimeters width depends on the shirts wearer.
( image 6-7) Place welt rectangle on the mark then make the welt. Add liner on the mark to make pocket bag. Trim the seams.
( image 8-9) Fold the liner to create a bag pocket. Stitch around bag pocket from the wrong side.
( image 10) This is a welt pocket, so I gave top stitch on it
( image 11) And the welt pocket is done. I'm so sorry I did it a bit hurry so I don't have that much step by step photo to show every detail in assembling this pocket.
Continue to the next step
( image 12) Place sleeve on the arm hole, Pin, then sew around it. After sleeves added, hem the bottom of sleeves, and the bottom of shirt
( image 13) Make button hole and add the buttons.
And that's it.. my batik shirt is done
Now it's your turn to make your own.
See you
Aand.. Happy sewing..
Ps:
Hai..
Kurang tahu apa sebabnya link download ke google drive belakangan ini tidak bisa otomatis ter-direct ke alamat drive, jadi harus request dulu. Sebelumnya bisa langsung mengarah ke drive dan otomatis bisa langsung di download. Kalau yang sekarang saya juga jadi agak kerepotan.
Karena saya tidak selalunya membaca email, jadi request teman2 sering terlewat..
Jika saya sedang aktif akan langsung saya arahkan ke drive agar pola bisa di download.


Great Article Vector Tracing
ReplyDelete