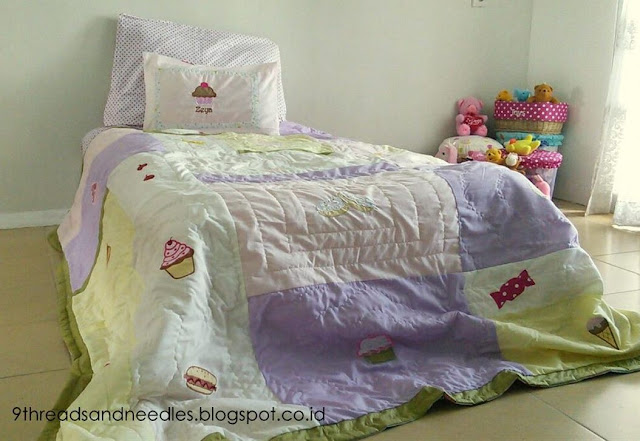
make a duvet cover
[ Part – I ]
CUPCAKE BEDDING
In my home town, during this season is very cool.. Wet season.. Rains every day..
I have many old blankets in my house, and nobody wants to use it. That's why I decided to make a duvet cover. I made this one from scraps.. there is no specific pattern for gathering this scraps. Here I will show you how to make this duvet covers. This duvet cover has interior ties and buttons at the back side.
Well..stop buying duvet covers!! You can make your own. It is quilted, but this Diy Duvet Covers instructions are easy to follow.
Well..stop buying duvet covers!! You can make your own. It is quilted, but this Diy Duvet Covers instructions are easy to follow.
 |
In my home there are some blankets that have been crumpled,, no one want to use them .. If I made a beautiful cover for them I believe any body will use them with no refuse.
I've made duvet cover few months ago with floral pattern, this time I want to make duvet cover for the other blanket, by utilizing some scraps I have .. not a real patchwork which arranged so well .. but I only arrange them following the scraps size. All of them are rectangular parts that are arranged together and each part is not the same size. For you who are looking for an idea to recycle your old blanket, maybe this Diy - Quilted Duvet Cover article can help you.
I've made duvet cover few months ago with floral pattern, this time I want to make duvet cover for the other blanket, by utilizing some scraps I have .. not a real patchwork which arranged so well .. but I only arrange them following the scraps size. All of them are rectangular parts that are arranged together and each part is not the same size. For you who are looking for an idea to recycle your old blanket, maybe this Diy - Quilted Duvet Cover article can help you.
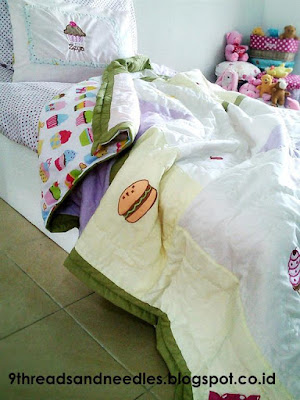
For the front side I want to use plain color fabrics. As for the back side I use fabric with cupcake pattern as cupcake is the duvet cover theme. For the main material on the front side is limited by using only 5 colors .. , not just because I don't really like too various color , too much colors combination will be consuming processing time. Too many color will probably take longer time to decide on which fabric I will choose and how to coordinate them.
So to make it easier I choose to use color palette like this. The combination of light purple, pink, white, light yellow and yellowish green seems pretty sweet in my eyes.
I use this color palette.
I really love the applique..and my little girl requested that this one to be decorated with applique too. Since my previous duvet cover I decorated with applique flower pattern, this time she wants to decorated with cookies pattern .. she really loves donut, cupcake, muffin, burger, ice cream, candy .. and ... so much more .. ^ _ ^
That's why for this time I chose the Cupcake theme.
So, let's get started.....
That's why for this time I chose the Cupcake theme.
So, let's get started.....
Supplies :
- Scraps, any size following the color palettes , you may use fat quarter fabric and also you may use your own color palettes
- 2m batting , any kind of batting, Thermolam or another kind of batting are allowed as long as it is not that too thick.
- 2m fabrics, I use bed sheet fabric width 250cm (for the back side)
- applique patterns
- fabric scarps for the applique
- old blanket
- and other sewing supplies
Step 1
Measure your old blanket which you want to make its cover. Mine is twin size 68” x 86” made from a kind of polar fleece so it is not that too thick.
Cut the batting following blanket size.
Cut the scraps in square and in any size , arrange until cover all of blanket..
Cut fabric size 7cm times the total circumference of the blanket + add a few centimeters for seams
Cut fabric for the back side following the blanket size.
Cut fabric size 7cm times the total circumference of the blanket + add a few centimeters for seams
Cut fabric for the back side following the blanket size.
This one is mine… uhmm.. it looks little bit messy.. I only gathering small pieces of fabrics without following any specific pattern…
Sew them together. Actually I am not sure with the result but.. I throw away my worries. Well,, let see what I can do with this scraps.. let's continue to the next step..
Step 2
Gather the pieces of scraps.
Step 3
Sew the applique, see this link to see how I made this applique Applique.
And continue with sewing the fabric ( the green one) to make border line.
And continue with sewing the fabric ( the green one) to make border line.
Here, it is my applique work.. I still want to make another applique to them, a candy or cherry I think is cute


Step 4
Let's go on to the next step shall we??
(image 1) Place batting under the work, cut the batting following the work size and PIN A LOT!! . Then give a single top stitch around the border circumference.
(image 2) Made quilting stitch around each motif of applique. This is not a real quilting stitch actually, just sew in free motion without following any consistent pattern. Here I made with straight stitch or rig rag stitch as seen on image 2
(image 3) for the back side :
Hem one side of back fabric. Mine, I hem only one side of 68" width. Note: only one side.
(image 4) Cut a piece of fabric, same color as fabric that I use for the backing . Cut 8" x 68" .. fold it half and press the fold with hot iron. Then attach it to the work precisely at the edge (the green color) as seen on image 4(image 5) Make a button hole on it.
(image 7) Now attach the back part with the front part. Note : the part I mentioned in image 3, connect with part image 4. then pin before sewing. Then sew them.
(image 8) Make some tie, to tie the duvet with blanket.
(image 9) Insert tie at the corner seams.
(image 10) Turn the back side out, use chopstick to push the corner and made a good shape. At the out side, the green border, make a top stitch, a straight stitch
(image 10) Turn the back side out, use chopstick to push the corner and made a good shape. At the out side, the green border, make a top stitch, a straight stitch
(image 11) If I turn it back to check the seams .. the tie position will looks like this, the connection is neat because it was already sewn by the top stitch we just did before.
(image 12) Attach the buttons following with the buttonhole position
Here's how the result looks like.. see the back side, the side with the cover to insert the blanket.

Step 5
Now lets do the blanket.
(image 13) Attach the tie / hook on each corner of the blanket.
(image 14-15) Turn the duvet inside out so that will see the hook. Place the duvet on the inside of the duvet by tying a string around the hook as shown on the image below.
(image 16) Then both of them, turn the front side out. Tidy up the blanket position, tip of the end .. then close the button.
And.. tadaaa.. my quilted duvet cover with cakes applique is done…
Really.. really.. LOVE it..
My old blanket did not retire yet ..horraay.. now any body wants to wear this blanket .. I am quite satisfied with the result ..
For the pillow, you can see here, bantal untuk cup cake duvet cover , to know how to make a pillow case to complete Cupcake Duvet Cover set.
Now you can try to make your own for your room with any theme you want ..
Any questions about the above article? You may add to the comment column below. I will try to answer it .. ^ _ ^
Happy Sewing ..


Kece bangettt hasilnya. Jadi pengen belajar jahit.
ReplyDeleteayuuk belajar jahit disini..jahit sarung selimut ini cuma jahitan lurus-lurus aja..mudah ga perlu bikin pola .
DeleteJahit tindas untuk quiltnya pake sepatu jahit biasa ya mak? eh bikin videonya dong..hehehe
ReplyDeleteiya bikin quilt yang ini pakai sepatu biasa ga perlu ganti sepatu quilting..rig rag stitch aja mak.. kapan-kapan kalau bikin lagi saya video-in yaa...
DeleteAsyiik ya mbk klu bisa jahit dn punya mesin jahit. Bisa bikin kreasi kyk gini
ReplyDeleteiya mb @ivonie zahra saya dulu beli mesin cuma niat jahit popok bayi, sekarang keterusan..nyandu..
DeleteWah selimutnya lucu banget, mbak. Nggak perlu beli selimut baru dong ya
ReplyDeletehehe..iya mb.. ga jadi dipensiun deh tuh selimut tua-nya.. dipakein sarung jadi seperti baru.
DeleteCantiiiikkkkkk.
ReplyDeleteKeren mbk. Selalu terpesona sm kreasi diy begini.
makasi mb Inda.. saya juga suka terpesona ma project diy..coba belajar pelan-pelan eh lama-lama bisa juga..
DeleteCongratulation for the great post. Those who come to read your Information will find lots of helpful and informative tips. High quality Quilt cover online
ReplyDelete